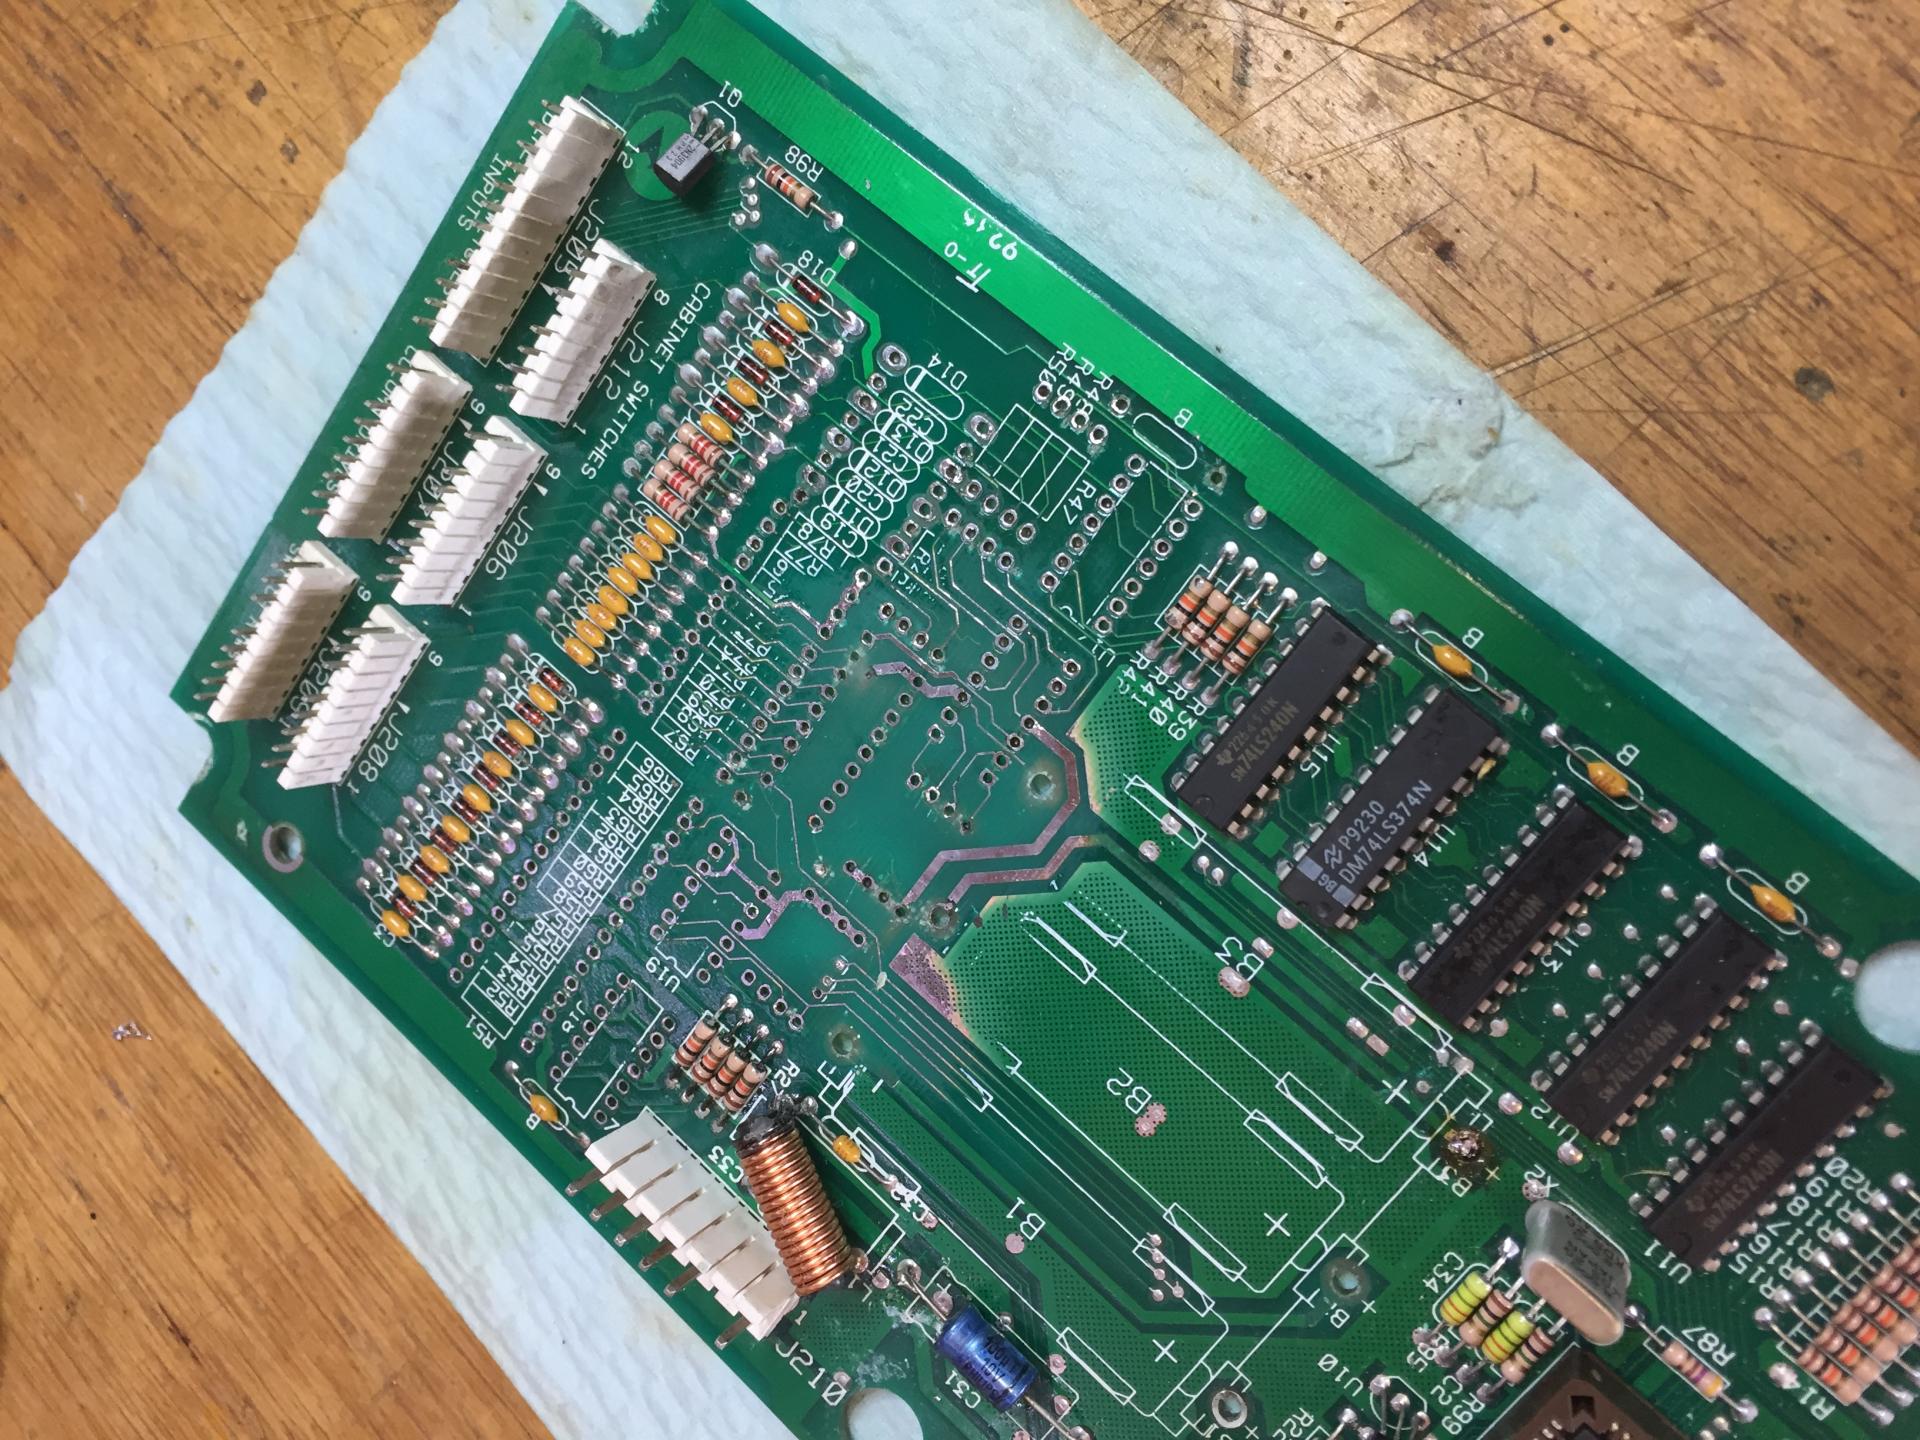
Took on a fix job for another Dr Who (2nd in two months). Leaky batteries have left the game with a dead switch matrix.
The initial inspection of the board did not look too bad, but as is ALWAYS the case, the bad stuff lies hidden underneath the components. I thought I would share some photos that illustrate how a board can look “nearly OK”, but have pretty serious damage.
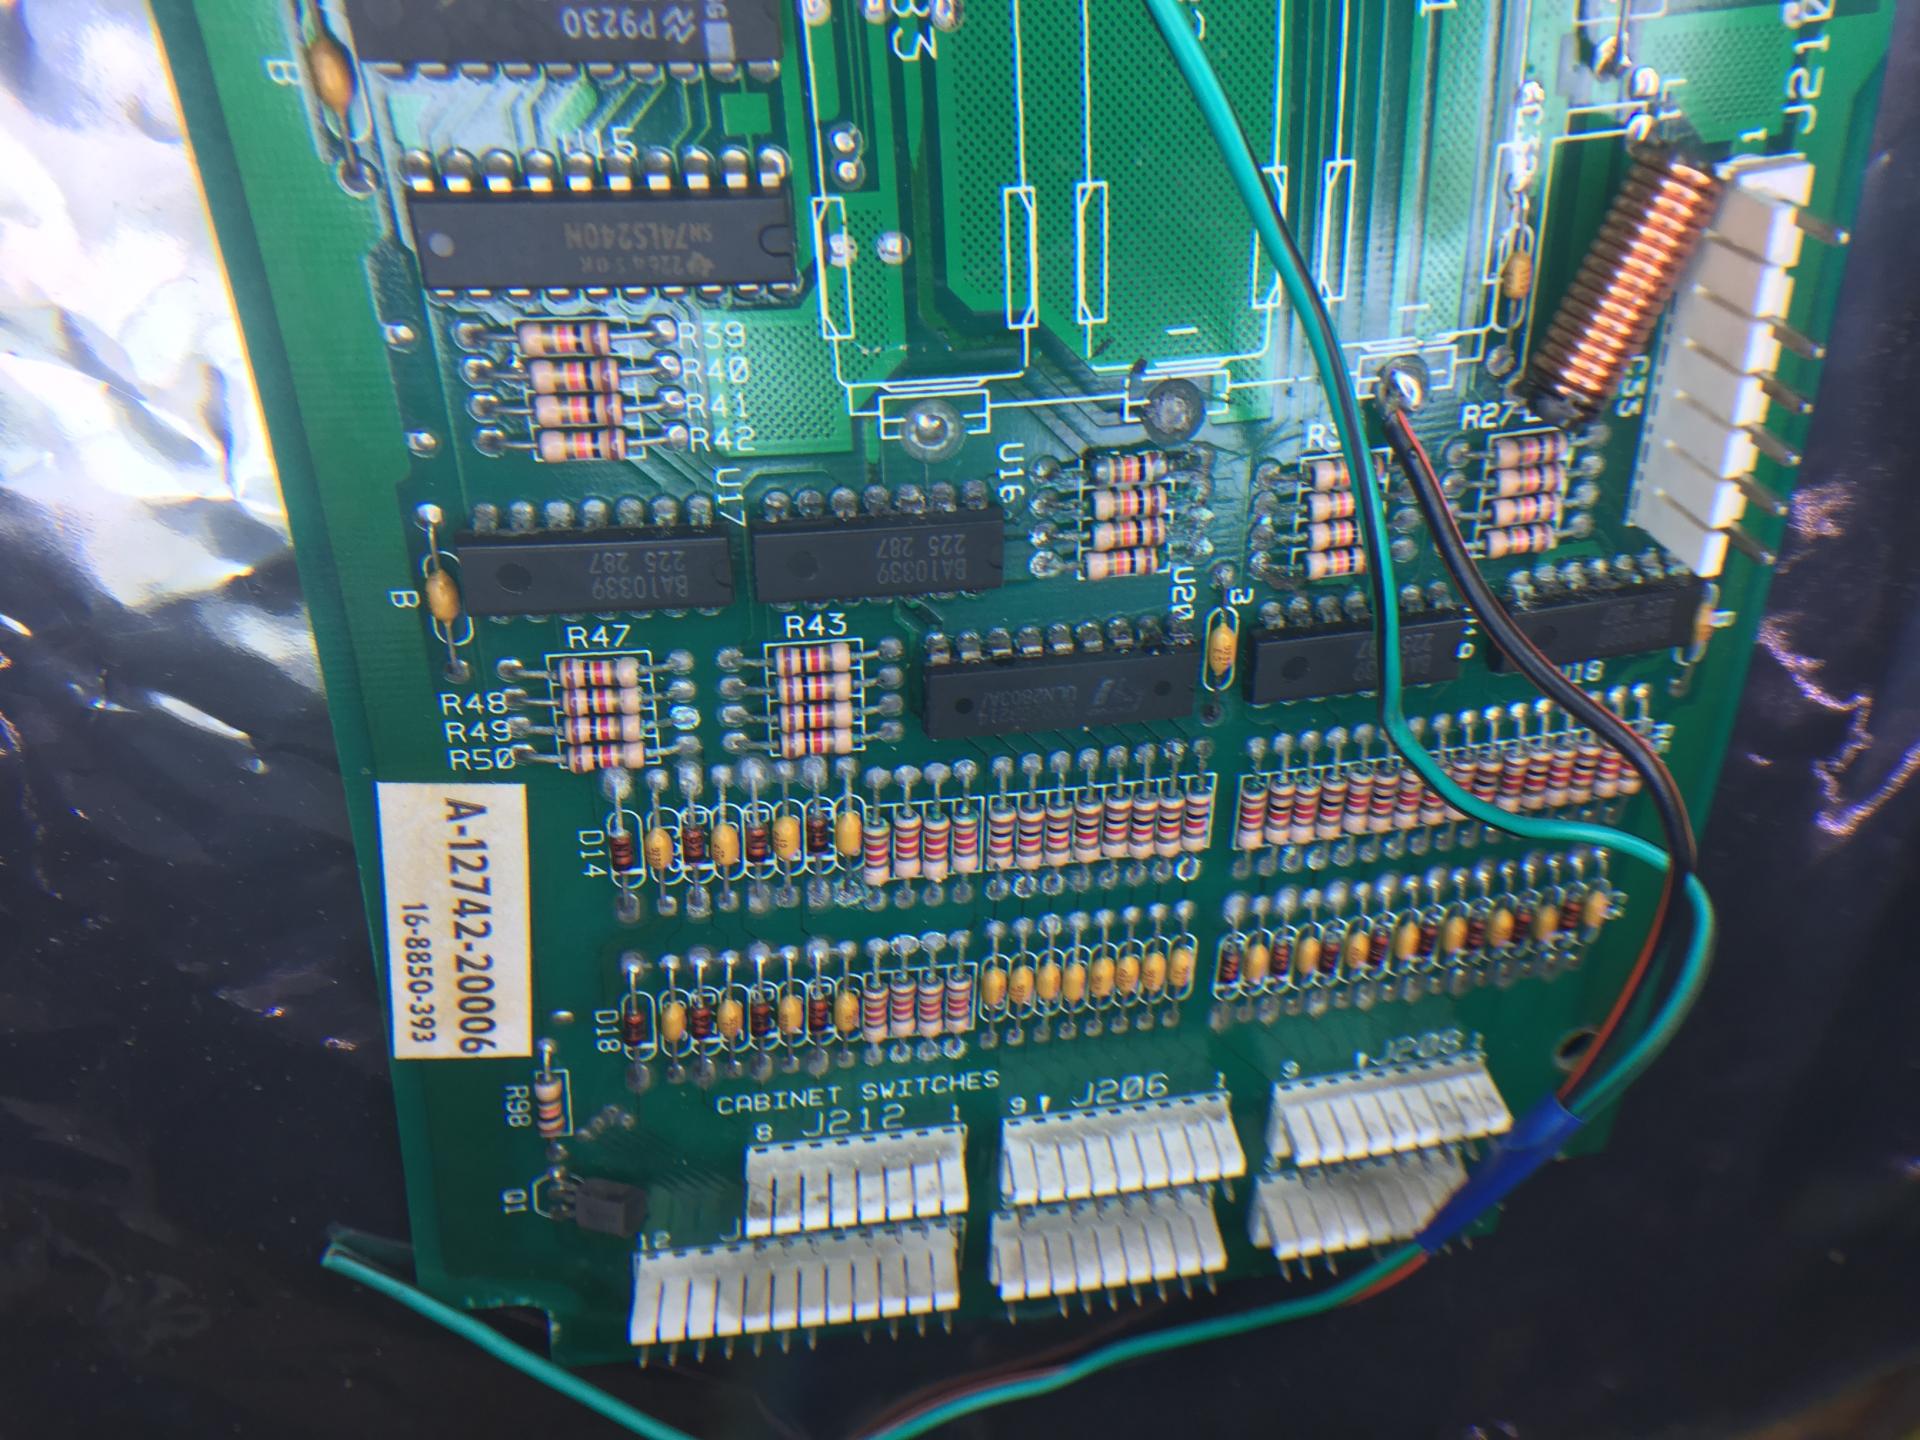
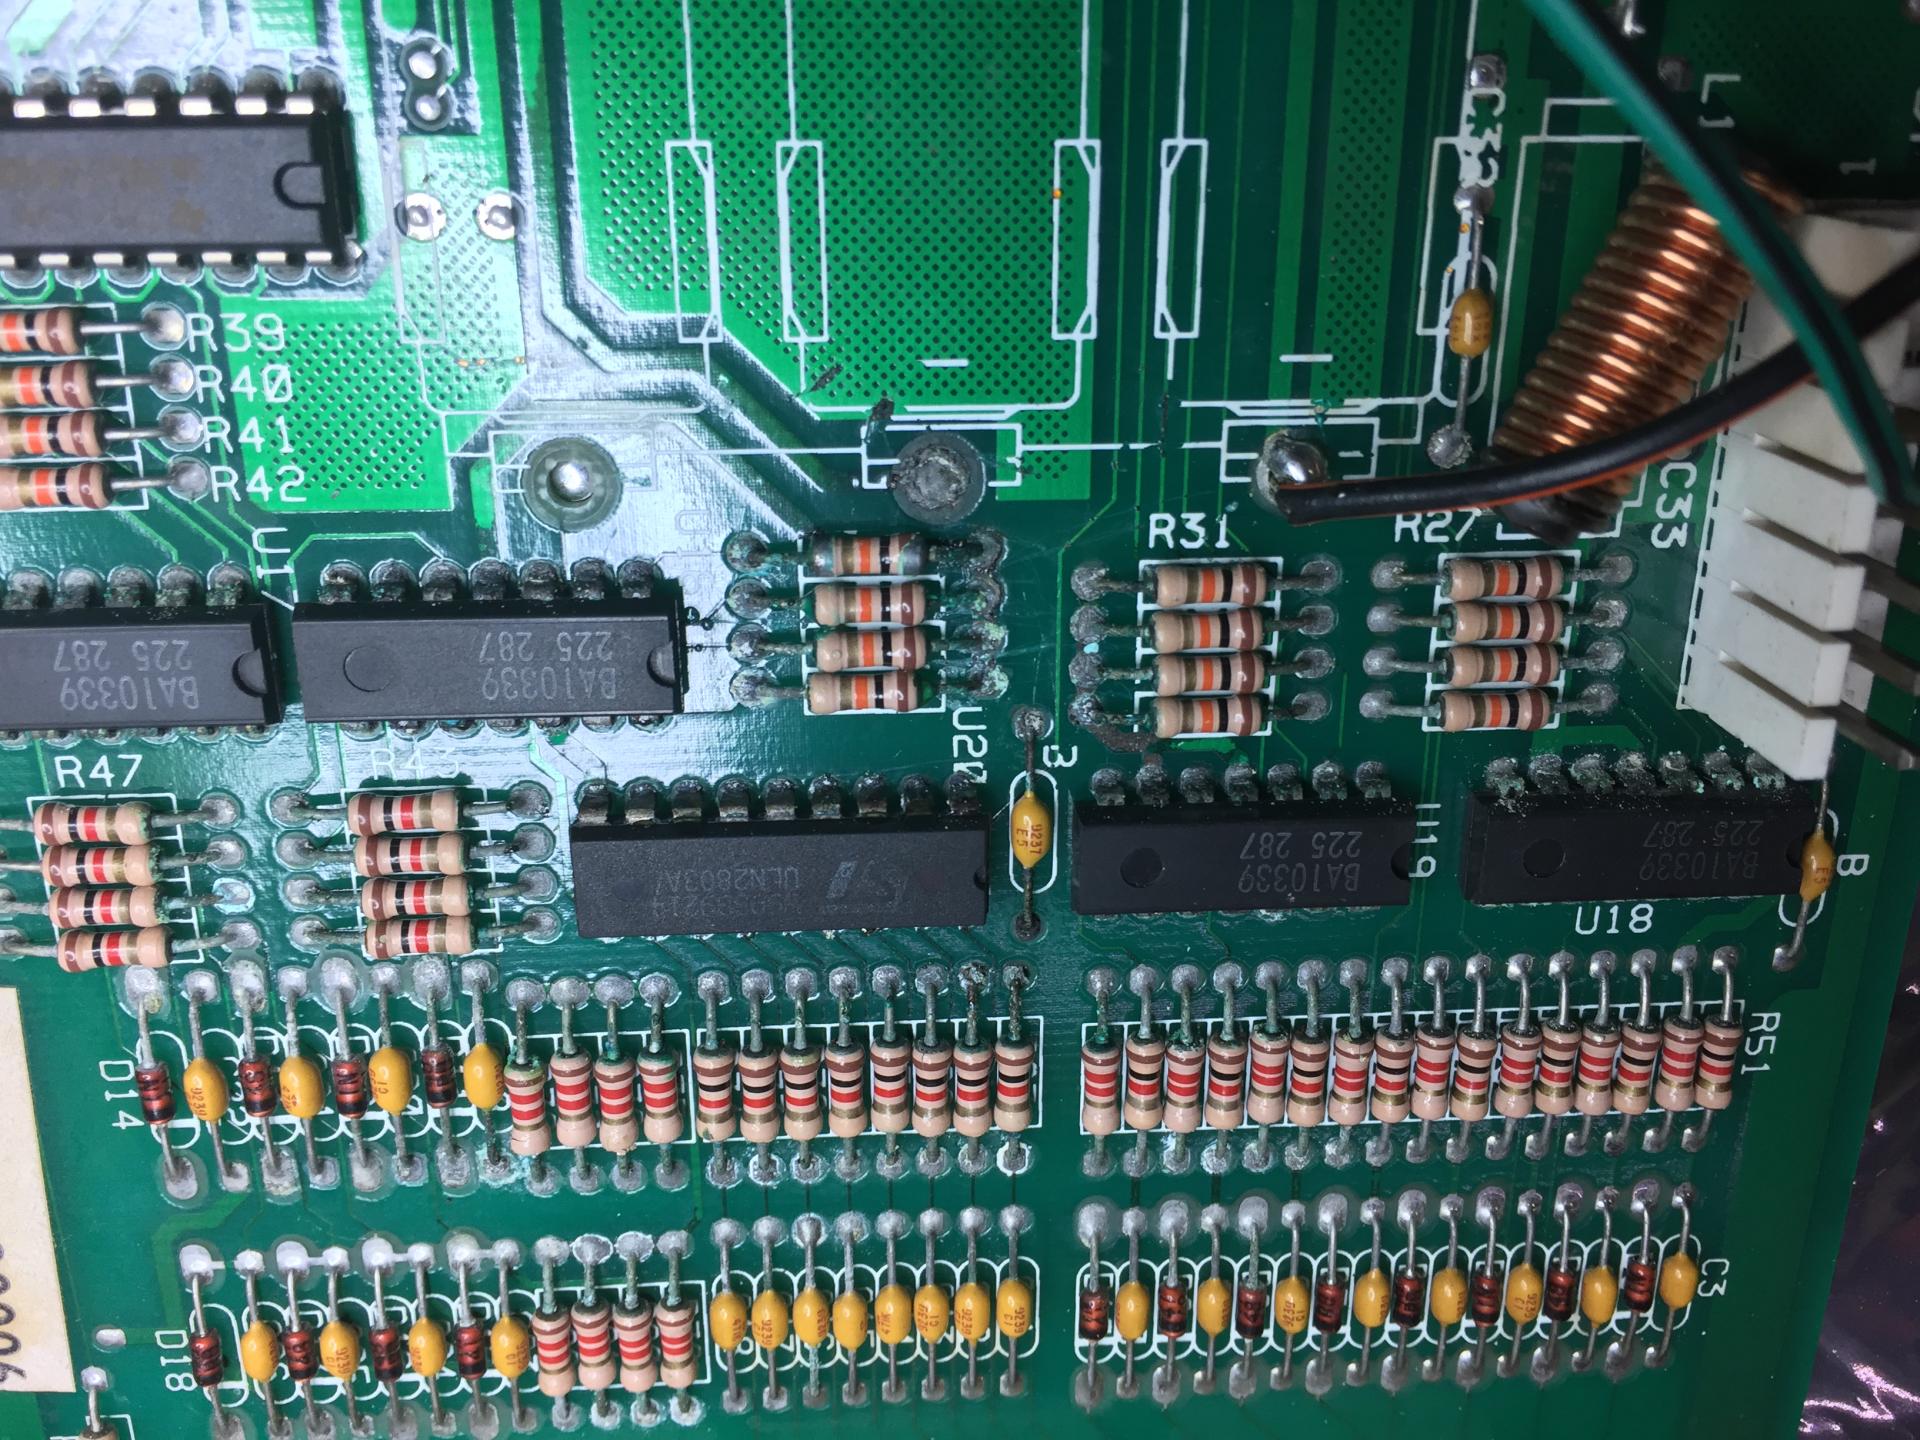
Here is the initial board looking … not too bad…
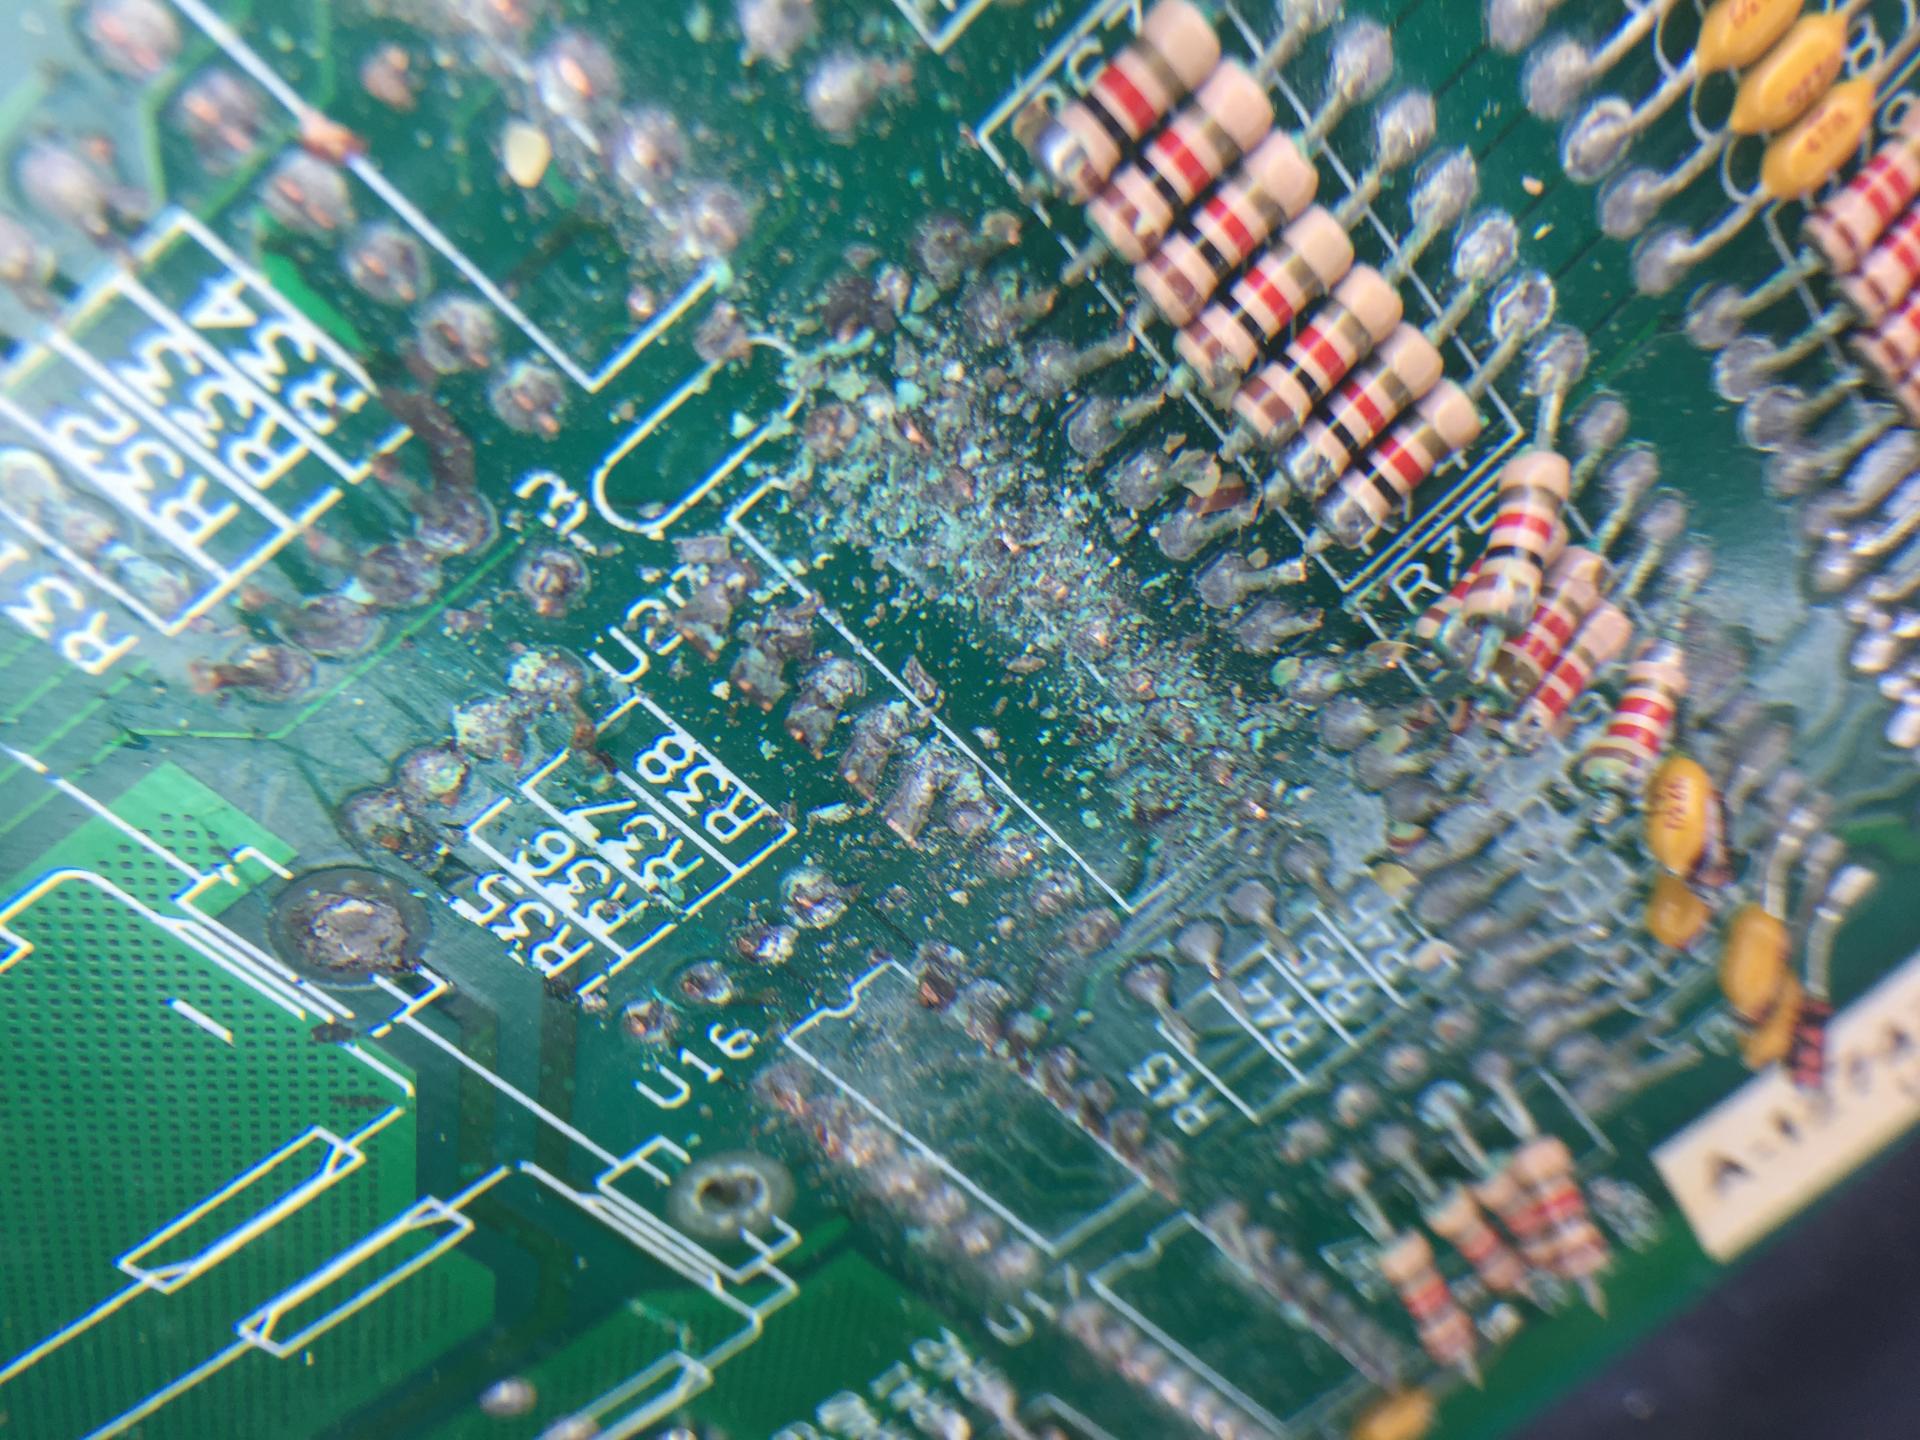
Now I have used a pointy set of side cutters to snip the leads of the parts to be removed and look what we find… Nasty crystalline schmoo!
A lot of desoldering and cleaning with a mild acid solution and we can see the board is in a pretty bad state. Quite a few traces broken and a lot of “BLACK ROT” underneath the green solder mask.
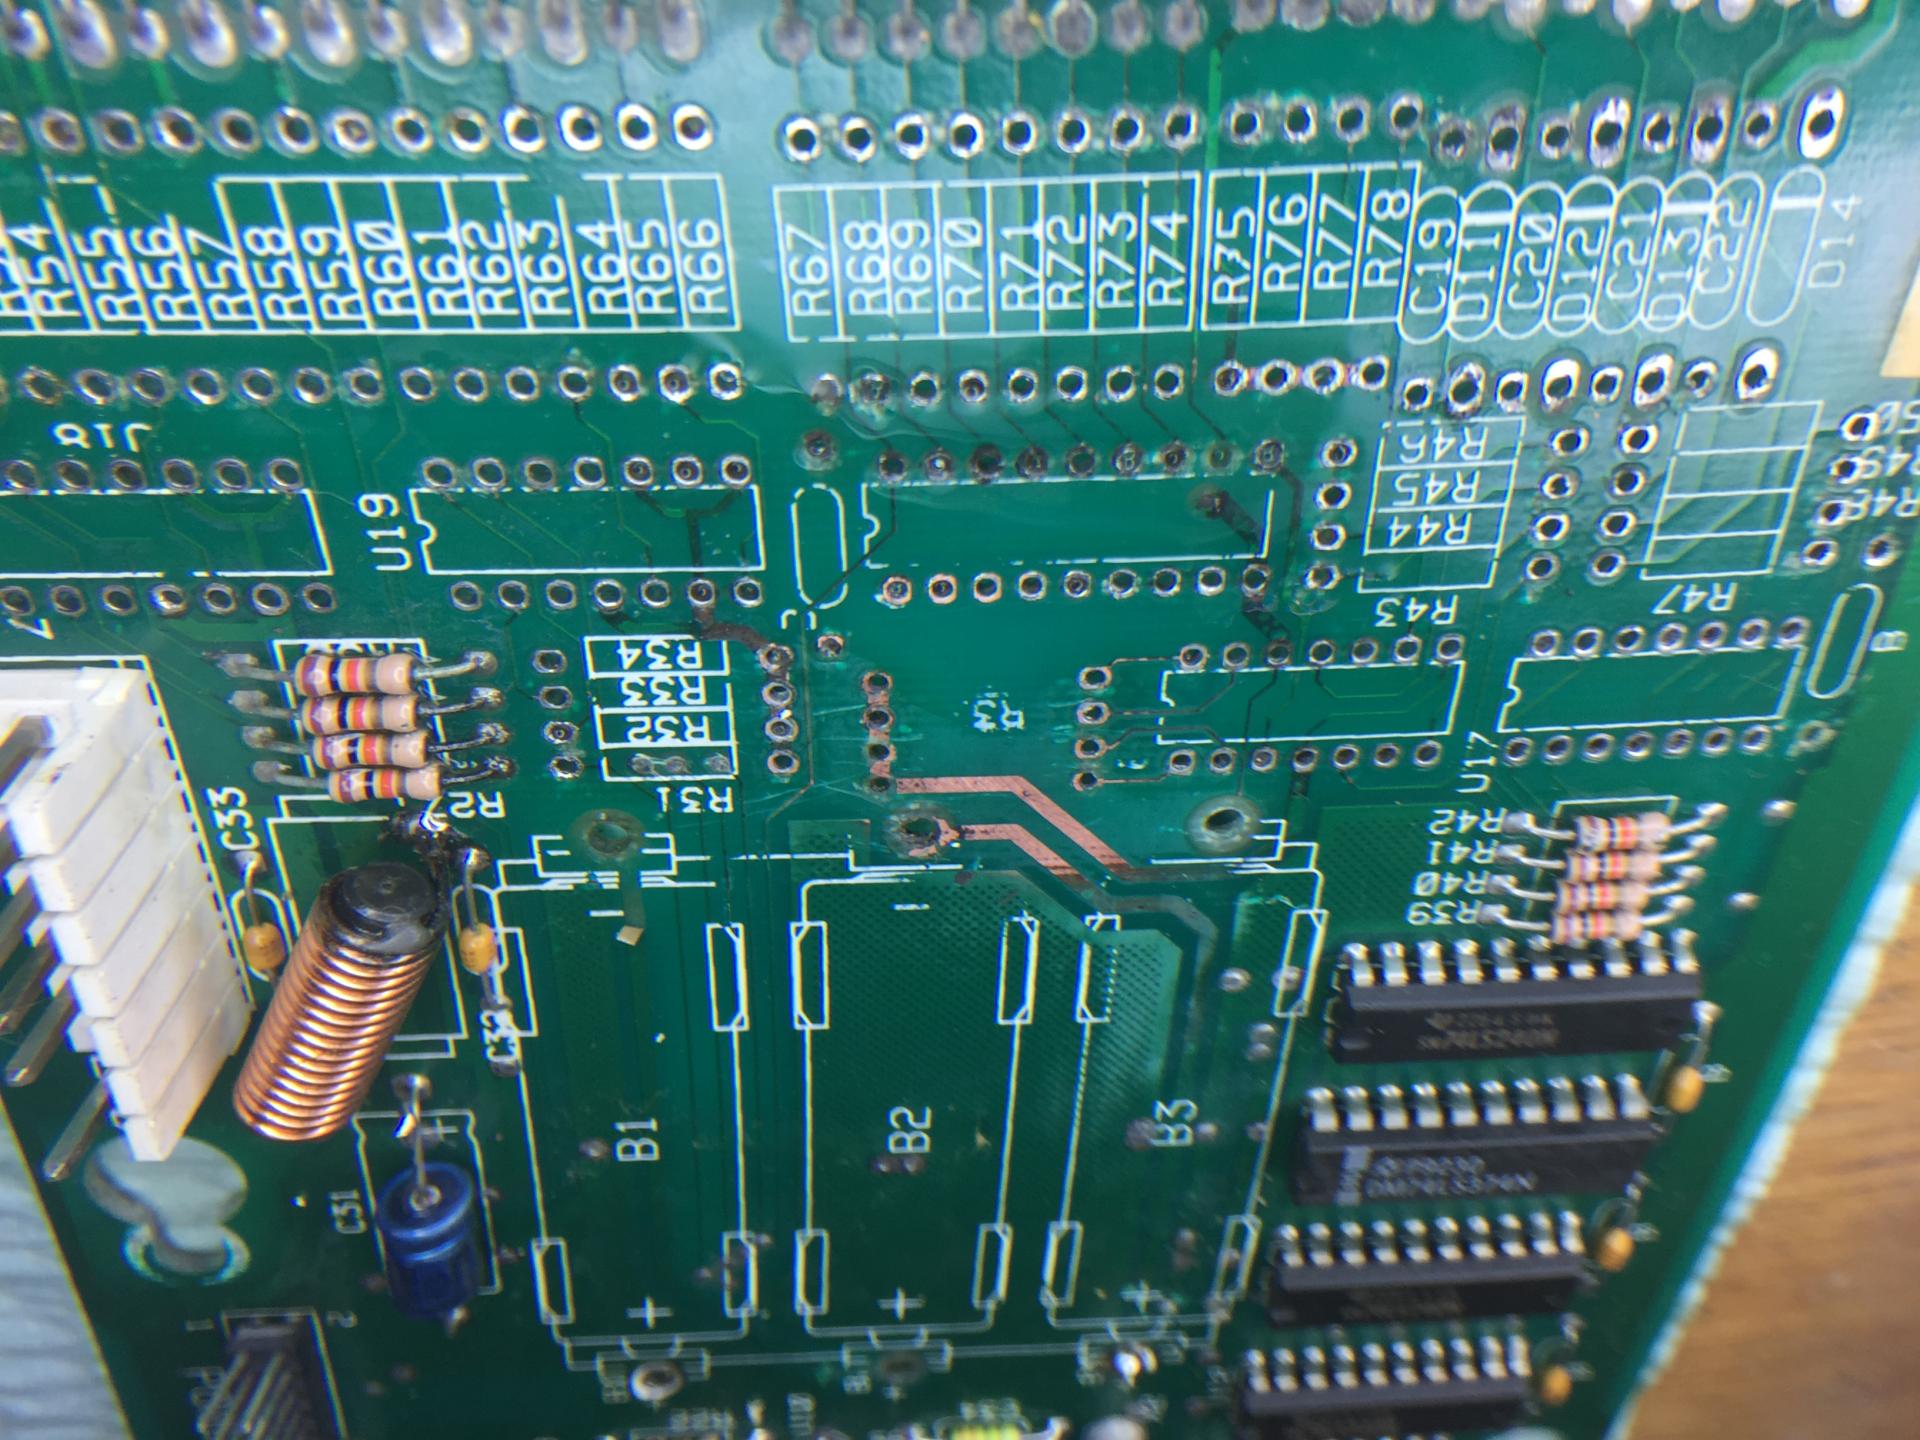
Some sanding with wet ‘n dry sandpaper and we can get some of the traces back to copper. I use a tonne of flux and solder wick to very lightly tin the bare copper. Enables me to see the broken and rotten traces better.
And here she is all back together and getting a bench workout. Using a logic probe and a diode to simulate the switches I can verify all columns and rows are working fine.
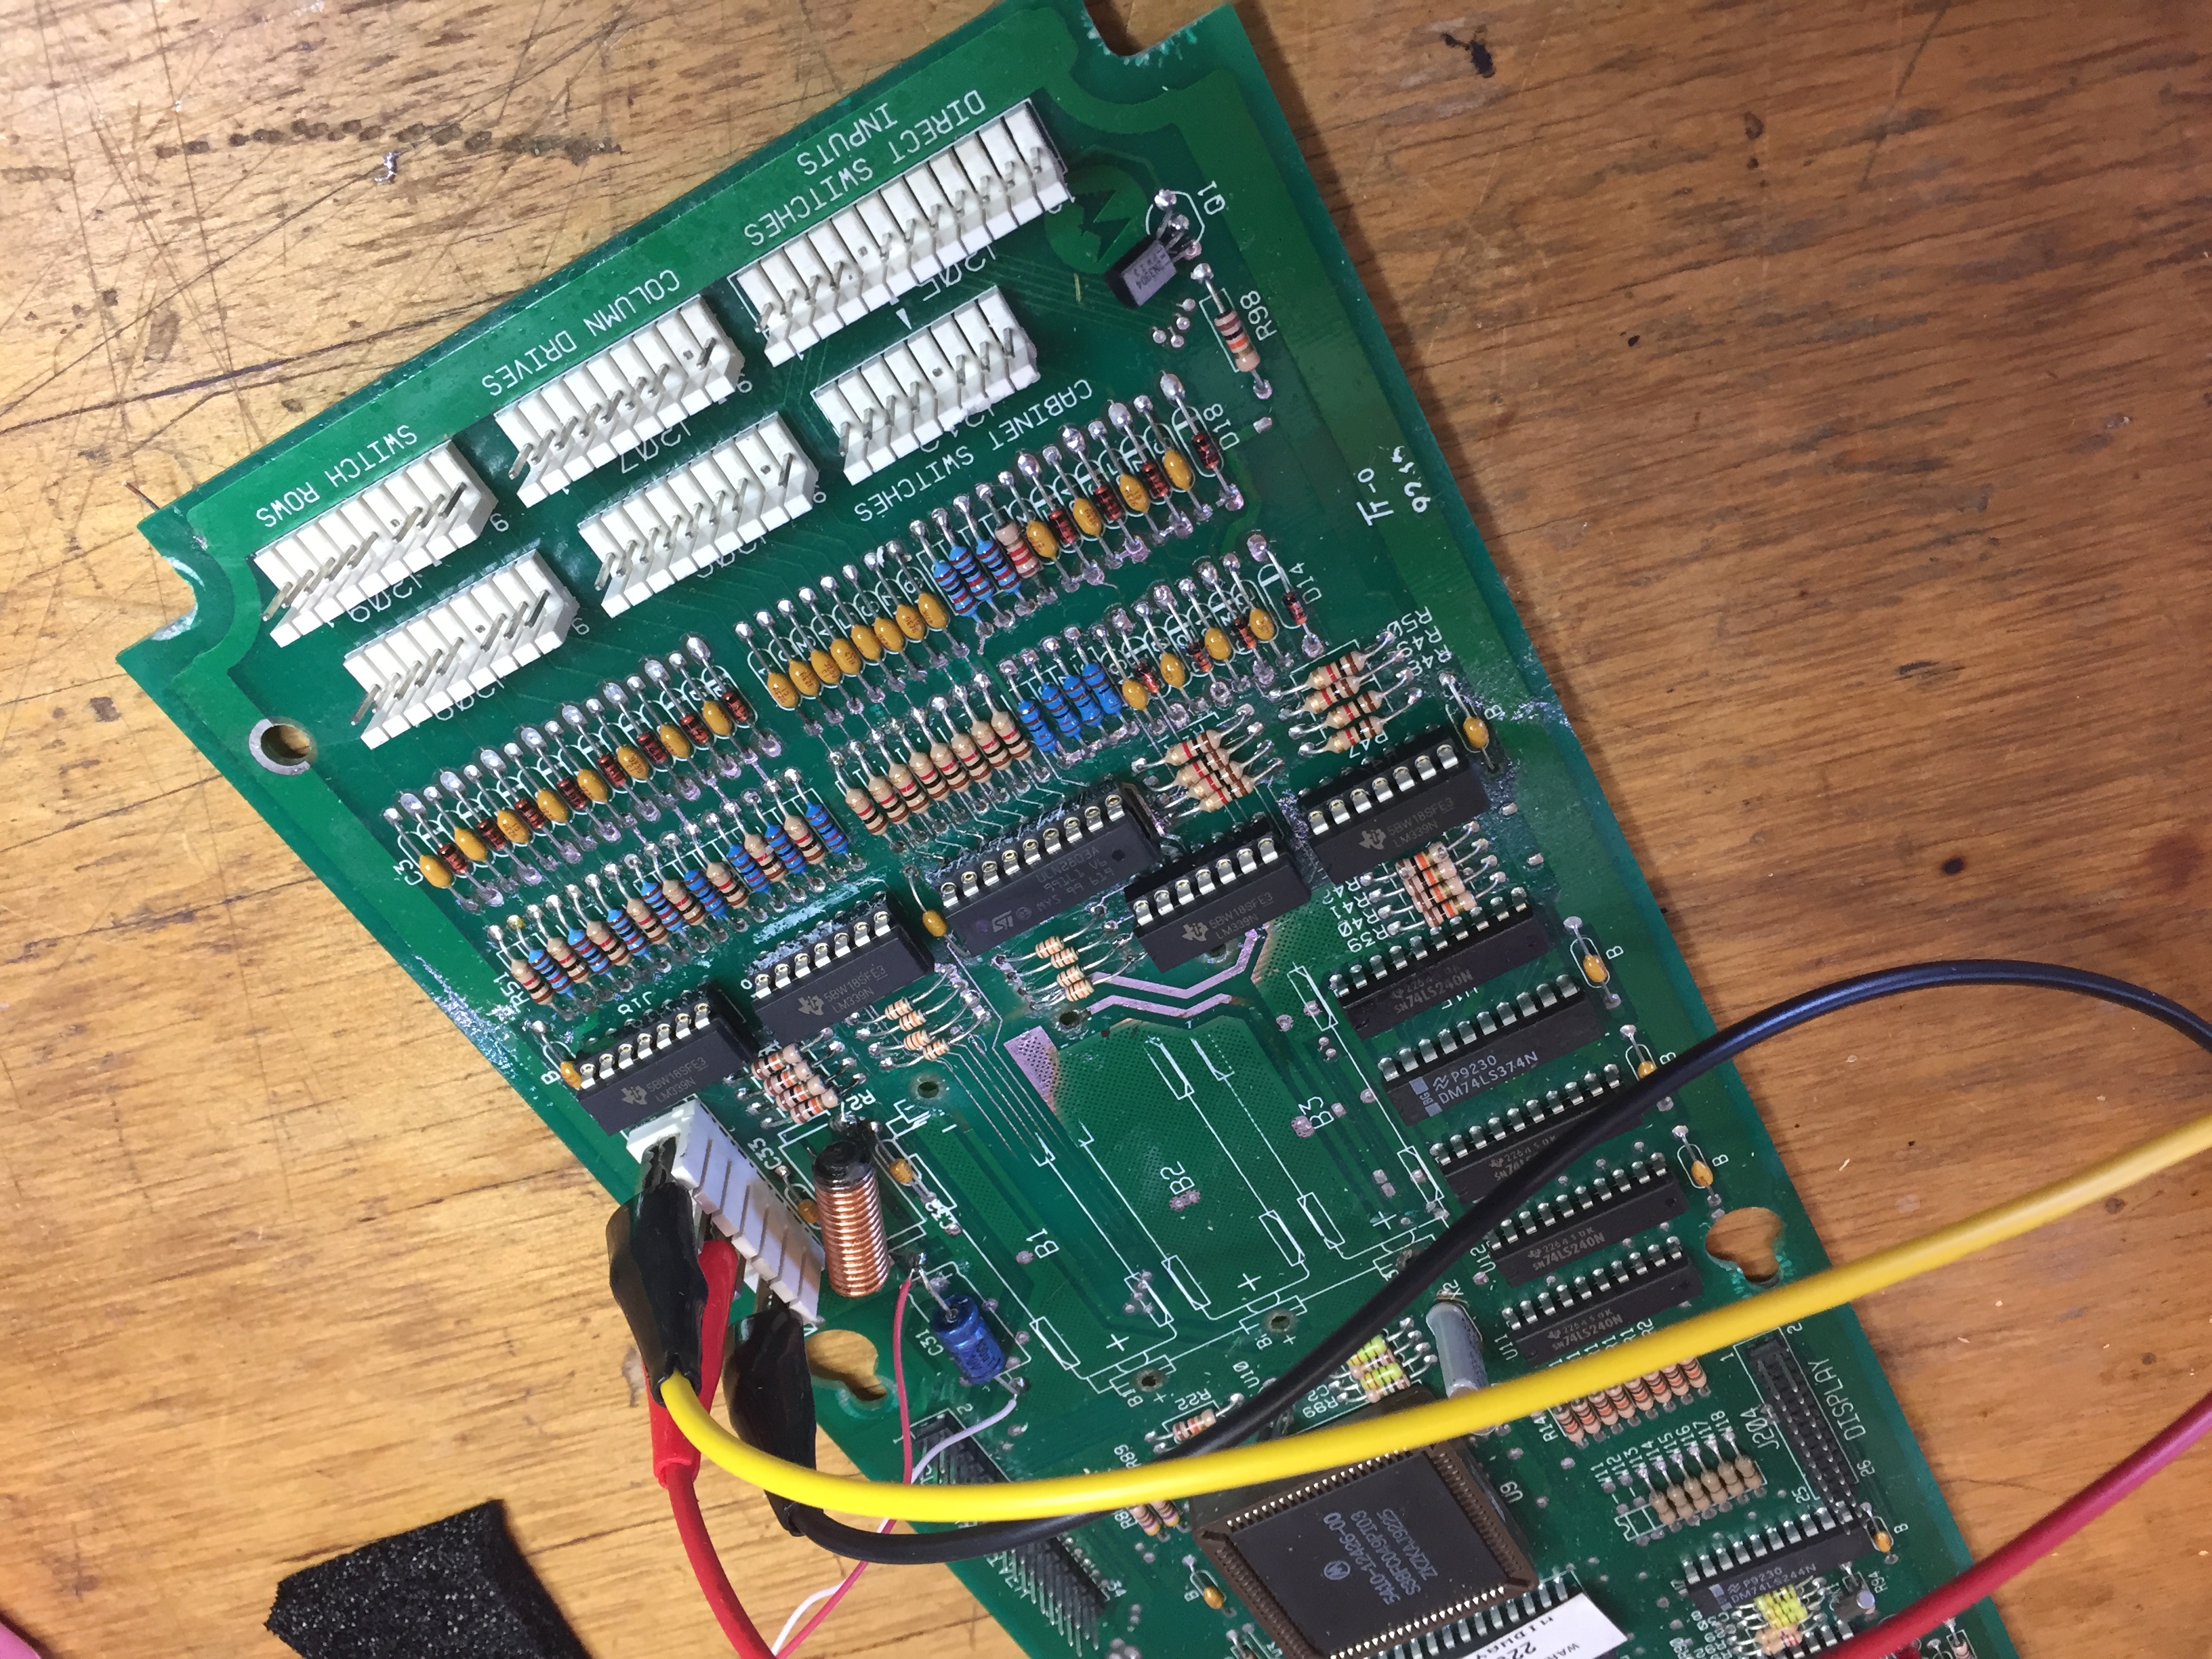
Next I installed into a “Creature from the Black Lagoon” (swapped the ROM) to verify the switch matrix all works and all other finctionality is as expected. Looking good. In the picture above I have applied a polyurethane conformal coating to the board for a bit of trace protection.
Next step is to pop it back in the original machine and give it a bash.
No photo, but I have added an off board lithium battery. I like to use the 1/2AA cells with a 2-wire molex to connect to the CPU. These 1.2AH batteries give the board a good operating life.
I’m a fan of the WPC circuitry. I think much of its design is highly commendable. I do wish they had used a little more copper on the traces and IC pads however. It takes skill and patience to remove these components without damaging the board. Add a bit of battery schmoo and the nature of the solder changes substantially. It is very hard to remove! Sometimes the process requires adding and removing fresh solder multiple time to get the old solder to flow. The biggest tip however is to use a good flux and use a LOT of it. (A bit like sex and lube … )